Documentation XFEM4U: Difference between revisions

From Struct4u
Jump to navigation Jump to search
 
(271 intermediate revisions by 2 users not shown)
Line 1: Line 1:
__NOTOC__
[[Main Page | BACK]]
===Introduction===
===Introduction===
This page contains the documentation of [[XFEM4U]]. It is meant as a full description of all functions and possibilities of the program.  
Other relevant information about XFEM4U can be found in the following links:
* [[Tutorials XFEM4U]]
* [[XFEM4U | Full list of features of XFEM4U]]
* [[XFEM4U |Full list of features of XFEM4U]]
* [[Example Projects]]  


===Release Notes===
===Release Notes===
Releasenotes XFEM4U 5.11: [[http://www.struct4u.com/nl/Release%20notes%20XFEM4U%20en.pdf link]]
Release notes of XFEM4U: [https://software.struct4u.com/downloads/XFEM4U/Release_notes_XFEM4U_en.pdf link]


===Possibilities and limitations===
===Features and limitations===


Full list of features of XFEM4U can be found [[XFEM4U | here.]]


[[File:Residential Steel Trusses Roof_3.png |600px]]
===Chapters user manual===
[[Get started with the Struct4U Engineering Tools | 1. Get Started]]
[[XFEM4U UI | 2. Basic concept User Interface]]
[[Struct4U Design Arrangements | 2.1 Design Arrangements and coordinates]]
'''3. Export/Import'''
[[Autodesk Revit/Dynamo | 3.1 Autodesk Revit/Dynamo]]
[[Tekla Structures | 3.2 Tekla Structures]]
[[XML Interface | 3.3 XML Interface]]
[[DWG/DXF | 3.4 DWG/DXF]]
[[SDNF| 3.5 SDNF]]
'''4. Geometry'''
[[XFEM4U Nodes | 4.1 Nodes]]
[[XFEM4U Supports | 4.2 Supports]]
[[XFEM4U Beams | 4.3 Beams]]


===Coordinate System===
[[Profile| 4.4 Section/Profile]]


The program knows four '''clockwise''' coordinate systems.
[[XFEM4U Plates | 4.5 Plates]]


====Main coordinate system====
[[XFEM4U Grid Lines/ levels | 4.6 Grid lines/levels]]


The location of this global coordinate system is arbitrary. The XY-plane coincides with the plane of the framework. This coordinate system is used for setting the node coordinates, node limitations and node loads. Calculated node deformations and support reactions will be displayed relative to this coordinate system.  
[[XFEM4U Outer Panels | 4.7 Outer Panels]]


[[File:MainCoordinates.png|200px|none|]]
[[XFEM4U Hall Wizard | 4.8 Hall Wizard]]


====Beam coordinate system====
'''5. Loads'''


The origin of this coordinate system is always in the beginning of the relevant beam. The XZ-plane coincides with the plane of the framework. The x-axis coincides with the beam-axis.  
[[XFEM4U Load Cases | 5.1 Load cases]]


[[File:BeamCoordinates.png|200px|none|]]
[[XFEM4U Load Combinations | 5.2 Load combinations]]


====Node coordinate system====
[[XFEM4U Loads | 5.3 Loads]]


[[File:NodeCoordinate.png|200px|none|]]
[[XFEM4U Load generator | 5.4 Load generator]]


It is possible to use a local (node-) coordinate system. The origin lies in the relevant node. The direction of the x-axis is determined by assigning a relative dx and dz coming from the relevant node ( see the figure above). Local coordinate systems can be used to calculate node limitations ( support reactions and restrains ), node loads and/or node deformations in an arbitrary direction.
'''6. Analysis & Design'''


====Plate coordinate system====
[[XFEM4U Analysis | 6.1 Calculation settings]]
The planar plane of the plate is the local XY-plane. If the plate is drawn clockwise then the Z-axe is positive.


[[File:PlateCoordinateSystem.png|200px|none|]]
[[Documentation Eurocode | 6.2 Eurocode Steel & Timber Design]]


The in- and output data will be displayed with regard to the above explained coordinate system.  
[[XFEM4U Eurocode RC  | 6.3 Eurocode Reinforced Concrete Design]]


*A force in the direction of the positive x- or z- axis is considered positive.
[[Eurocode Steel Connections | 6.4 Eurocode Steel Joint Design]]
*A moment rotating from the positive x-axis to the positive z-axis (according to the cork-screw rule) is positive.
*A moment opposite to the 'clockwise' rotation is positive.  


===Input===
'''[[Documentation ANSI | 7. Building Code ANSI]]'''
====Navigation in 3D====
For navigating in your 3d model, 2 common methods are supported. You can set which one you want to use. Tab Settings & Manual > Settings > Navigate tab See Navigating


1. Method as in '''Autodesk Revit''' (default)
'''8. Display calculation results'''


* '''Zooming in and out'': Use the mouse wheel.
[[XFEM4U Display Results | 8.1 Display results]]
* '''Pan'': Press the mouse wheel and drag.
* '''Orbit'': Press the mouse wheel and '''SHIFT''' key together and drag.


2. Method as in '''Tekla structures'''
[[XFEM4U Analysis | 8.2 Calculation settings]]
* '''Zoom in and out": Use the mouse wheel.
* '''Pan": Press the mouse wheel and drag.
* '''Orbit": Press the mouse wheel and '''CTRL''' key together and drag.


XFEM4U also supports the use of a 3d mouse (from e.g. [https://3dconnexion.com/nl/spacemouse/ 3D Connection] ) which makes working even easier and faster.
[[Struct4U Optimization | 8.3 Optimization]]


[[File:3DConnection.jpg | 200px]]
'''9. UI and other settings'''


====Geometry====
[[XFEM4U Edit | 9.1 Edit]]


In this section we have a look at all the geometry functions within [[XFEM4U]]
[[XFEM4U Selection | 9.2 Selection]]


[[File:DocumentationXFEM4UGeometry.png | 1000 px]]
[[XFEM4U View | 9.3 View ]]


=====Beams=====
[[XFEM4U  Display Options | 9.4 Display options]]


======Preface======
[[Struct4U Dockable Windows | 9.5 Dockable windows]]
In the graphical screen beams can be added very easy by drawing them. Select this item in the function bar.
Beams are drawn as a 'polyline' just as you know it from AutoCAD.The begin node from a following beam is the end node of the last drawn beam.


It is possible, but not necessary, to draw nodes before you insert the beams.
[[Struct4U Changing Dimensions | 9.6 Changing dimensions]]
You can also start with drawing the beams, in this way the nodes will be inserted automatically.


When you draw your first beam, the dialog box shown below appears. In this box you can, among other things, insert the beam connections and the profile of the beam. Use the escape-key or click the right mouse button to end the drawing of the beams.
[[XFEM4U  Menu | 9.7 Menu]]


[[File:DocumentationXFEM4UBeam1.png | 500px]]
[[XBeam2D XFrame2D Preferences | 9.7.1 Preferences]]


As you are drawing a beam, help lines (horizontal and vertical) will appear connected to the previous inserted nodes. Often the node, to which you want to draw the beam, has the same x- or y- or z-value as the previous one. In this way it is easy to insert nodes. Obviously you can adapt the coordinates afterwards numerically or by moving the node.  
[[XBeam2D XFrame2D Drawing| 9.7.2 Drawing]]


[[XBeam2D XFrame2D Snap options| 9.7.3 Snap options]]


While drawing a new beam, a dimension line parallel to the beam in one of the main directions x,y or z will appear. You can, just as you know it from AutoCad, immediately insert the distances numerically by entering the value / values from your keyboard. There are 3 possibilities for drawing a beam:
[[XBeam2D XFrame2D Regular grid| 9.7.4 Regular grid]]


[[XBeam2D XFrame2D Output| 9.7.5 Output]]


'''1. Drawing a beam with a known length in one of the main directions.'''
[[XBeam2D XFrame2D User defined profiles| 9.7.6 User defined profiles]]


The value will appear in the dimension line. Here you can type in the distance. By the use of the enter-key the input is closed and the beam with that length will be added.  
[[XBeam2D XFrame2D Preview | 9.7.7 Preview]]


'''2. Drawing a beam using relative Cartesian coordinates (dx, dy, dz).'''
[[XFEM4U Backup files | 9.8 Backup files]]


First you enter the distance in x-direction. The value will appear in the dimension line. Thereafter you type a semicolon ";" and the distance in y-direction. The value will appear in a second input field. Next you type a semicolon ";" and the distance in z-direction. The value will appear in a third input field. By the use of the enter-key the input is closed and the beam is added.  
[[XFEM4U Context menu | 9.9 Context menu]]


'''10. Background information about calculations'''


'''3. Input of relative cartesian coordinates (dx, dy, dz) or absolute cartesian coordinates (x, y, z).'''
[[XBeam2D Deflection Calculation | 10.1 Deflection]]


Press the space key and the dialog box below appears. Here you can enter relative coordinates or absolute coordinates directly.
[[Struct4U tapered section| 10.2 Tapered section]]


=====Profiles=====
[[Background Information and Theory | 10.3 Background steel & timber Eurocode]]


=====
[[FEM best practices and examples | 10.4 Finite Element Mesh & Solver]]


===Shortcuts===
[[XFEM4U UI and settings | 11. UI and other settings]]

Latest revision as of 20:13, 11 November 2022

BACK

Introduction

This page contains the documentation of XFEM4U. It is meant as a full description of all functions and possibilities of the program. Other relevant information about XFEM4U can be found in the following links:

Release Notes

Release notes of XFEM4U: link

Features and limitations

Full list of features of XFEM4U can be found here.

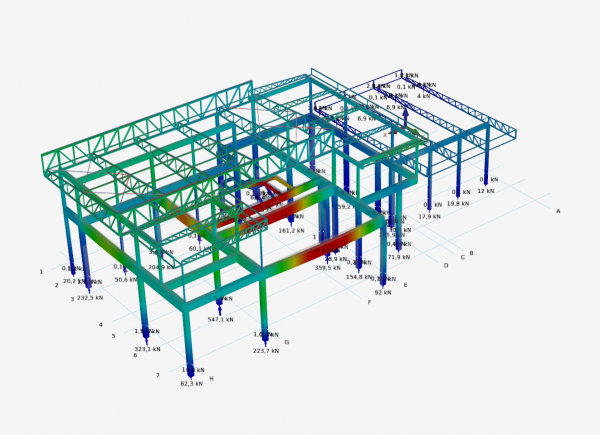
Residential Steel Trusses Roof 3.png

Chapters user manual

1. Get Started

2. Basic concept User Interface

2.1 Design Arrangements and coordinates

3. Export/Import

3.1 Autodesk Revit/Dynamo

3.2 Tekla Structures

3.3 XML Interface

3.4 DWG/DXF

3.5 SDNF

4. Geometry

4.1 Nodes

4.2 Supports

4.3 Beams

4.4 Section/Profile

4.5 Plates

4.6 Grid lines/levels

4.7 Outer Panels

4.8 Hall Wizard

5. Loads

5.1 Load cases

5.2 Load combinations

5.3 Loads

5.4 Load generator

6. Analysis & Design

6.1 Calculation settings

6.2 Eurocode Steel & Timber Design

6.3 Eurocode Reinforced Concrete Design

6.4 Eurocode Steel Joint Design

7. Building Code ANSI

8. Display calculation results

8.1 Display results

8.2 Calculation settings

8.3 Optimization

9. UI and other settings

9.1 Edit

9.2 Selection

9.3 View

9.4 Display options

9.5 Dockable windows

9.6 Changing dimensions

9.7 Menu

9.7.1 Preferences

9.7.2 Drawing

9.7.3 Snap options

9.7.4 Regular grid

9.7.5 Output

9.7.6 User defined profiles

9.7.7 Preview

9.8 Backup files

9.9 Context menu

10. Background information about calculations

10.1 Deflection

10.2 Tapered section

10.3 Background steel & timber Eurocode
10.4 Finite Element Mesh & Solver

11. UI and other settings